Setup ‘Check Out Assets’
First to set up the ‘Check out assets’ function, you will need to enable the option in the settings.
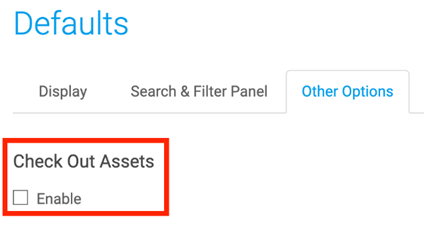
Step 1. We do this by clicking on your profile image > Settings > Configuration Options > Defaults > Other Options.
Step 2. Once there Click on enable tick box for Check Out Assets.
Step 3. Now it is enabled, admins can now allow different roles to check out and check in assets.
Note: all administrators will be able to check out assets
Step 4. You can also edit the number of days that the consumers have to check out the content before Canto Automatically Checks the Asset back in with the previous version. An email notification setting will be sent before that happens.

Congratulations! You have now completed the activation of the Check Out Assets Function.
Checking Out Assets
Step 1. Now to perform a check out of asset you will need to select the asset from the Main library you wish to check out, and then navigate to the version metadata field.
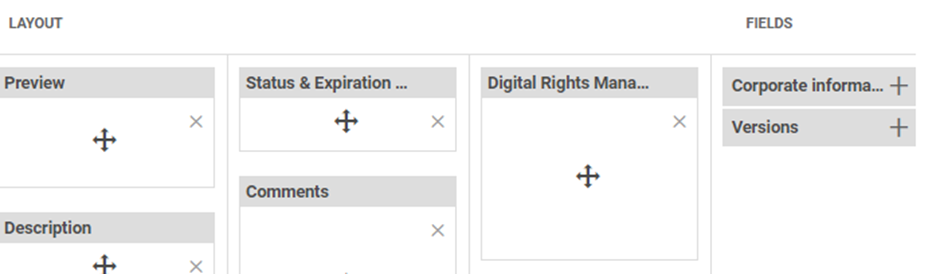
Note: If you don’t have this displayed, you will need to go to Settings > Configuration Options > Information Page. Then add the field by clicking the ‘+’ button and drag to where you would like to locate the metadata field. As seen below.
Step 2. Click the three dots next to the version you wish to ‘Check out’ and work on.

Step 3. Click on Check out.
Step 4. You will then be prompted with the following information:

Step 5. Click Yes to accept.
Step 6. The asset will be marked as locked in all previews.

Checking In Assets
Step 1. Go to the locked asset’s information page and locate the Versions field.
Step 2. Click on ‘Check In’
Step 3. Upload the new version that you would like to check in from your local storage.
The asset’s status will be set to Pending and is set as the Current version.